News

What exactly is Propagation? It is the creation of plant specimens by natural processes from the parent stock. There are two types of propagation - sexual and asexual. Sexual propagation is drawing from the genes of the parents to create another plant. The floral parts of the plant are pollinated and seeds are created. Plants grown from seeds are a unique mix of the parents genetics. The resulting plants are all variable. Sexual propagation is growing from seeds or spores. Asexual propagation is taking part of one parent plant and causing it to grow into a new plant. Plants grown from asexual propagation are a genetic ‘carbon copy’ of the parent plant. The resulting plants are all identical. Asexual propagation techniques that you could do at home - division, cuttings, layering, grafting and budding. To grow from seeds you either purchase seeds from a seed company or save the seeds from a plant in the garden. There are two different types of seeds available from a seed company - open pollinated and hybrid seed. Open pollinated seeds has been pollinated by any pollinators - bees, wasps, insects etc - and as a result has pollen from whatever plants the pollinator has visited included in the seed creation. There can be a wide range of genetic variability in the seeds that then grow into plants. Heirloom seed varieties are always open pollinated. Hybrid seeds are developed in a controlled pollination situation where only the pollen from the two desired parents with the desired attributes ( pest and disease resistance, yield, vigour, flavour etc) is used for pollination. The seeds are then grown to see what attributes they have. And this process is repeated and repeated until consistent results are produced and those seeds are then sold. The resulting plants should be very consistent and true to form. The downside with hybrid seeds is once planted in the garden and open to pollinators, the seed collected from them will not reproduce true to form. So to get the consistent results you have to continue buying the hybrid seeds. The time and effort that goes into creating the hybrid seeds is why they are more expensive than open pollinated seed. To collect seeds, you simply need to let the plant bloom, be pollinated and to create a seed pod or fruit. You need to let the seeds mature on the plant - they generally turn brown or black and they dry out -you can often hear them rattling in the pod. At this point the plant will prepare to spread the seed so you will see the pods begin to crack open. This is the point where you cut off the stem with the seed pods on them, put them in a paper bag and leave it in a dry place for the seeds to fall out and collect in the bottom of the paper bag. Remember to label them so you know what you have saved and discard the stem and seed pod. If you want to try hybridising your own seed, you have to choose two varieties of the same plant with the attributes you want ( flower colour, shape, size etc), and you have to exclude the pollinators, by netting or bagging the flowers before the buds open at all. You then have to act as pollinator, transferring the pollen between the two flowers with a paintbrush and then continue to keep the natural pollinators out of the flower until the seed pods have developed. Then you need to collect the seed as described above and grow the seeds to see what attributes and how they present have been shared amongst the baby plants. Asexual propagation is used in the horticulture industry to obtain consistent plants that can be marketed and sold. The growth habit, the flower shape, colour and size etc are all the same as the parent plant because it is a direct genetic copy of that plant. This is also how a plant that is grown from seed and has all the desired attributes the grower wants is then reproduced. They can’t use seed to produce more plants as they will be variable to the parent plant so they use asexual propagation techniques to create identical plants. The type of asexual propagation depends on the growth habit of the plant. Division is the easiest of the techniques. It is commonly used for clumping plants such as herbaceous perennials -such as agapanthus, flax, daylilies and renga renga- and bulbs. It is typically carried out in winter or early spring (if the plant is frost tender). You can remove small divisions off the edge of the root ball or split it in half. Dig the plant carefully up, avoiding root damage, and place 2 sharp spades back to back in the rootball and force them apart. Growing from a basic cutting involves taking a piece of a plants stem or branch and putting it in potting mix or water to grow roots. There are a few things you need to know; When you take the cutting you need to cut under a ‘node’ ( where a leaf attaches) at the bottom and just above a ‘node’ at the top. This is because growing hormones are located at these points and is where the roots or new growth will develop from. You need to remove all the leaves from the bottom half of the stem before you put it in potting mix or water. If the remaining leaves are large, cut them in half so the plant can still photosynthesis and feed itself while it is growing roots but not have too much greenery to keep alive. There are a number of different methods of taking cutting from different parts of the plant, depending upon the type of plant you are trying to grow. Layering is where part of the parent plant - a stem or branch- is pegged down in contact with the soil while still being attached to the parent plant. The point that is pegged down will grow roots and at that point it can be severed from the parent plant to form its own plant. The most common version of this are the runners sent out by a strawberry plant. Grafting is done to combine the attribute of the top - the flowers, growth habit or fruit - with the growth habit of the bottom ( the rootstock). A simple example is a grafted tomato. The tomato with its specific variety attributes eg Beefsteak, is grafted onto a gourd rootstock. The rootstock is much stronger than a tomatoes root system so the tomato plant grows faster and bigger than normal and produces the tomatoes faster than usual. It has a lot of benefits. Another example is to create a dwarf variety of fruit tree such as apple or citrus variety. The desired fruit is selected and the wood is grafted onto a weaker grower rootstock which means the tree will not grow as big or as strong while still producing fruit. It is important to note that if you ever see green leaves appearing from underneath the graft site ( the leaves of the rootstock) to remove them as soon as possible. If it starts to grow it will take the energy from the grafted material and cause it to weaken and die. Fruit trees and deciduous trees are commonly grafted. Budding is very similar to grafting except instead of a piece of stem being grafted into the rootstock, a bud is removed from the mother plant that has the desirable attributes for the ‘top’ and is slipped under the bark of the rootstock where it attaches and begins to grow. Roses are a common example of budding being used. Propagation is a really interesting skill to learn and develop and it is a useful way to gain new plants or add varieties to your garden at little or no cost. Written for Gubba by Kelly Jean Reyland from Garden Advice NZ (www.gardenadvice.co.nz)

The flavour of store-bought potatoes simply does not compare to homegrown potatoes - especially the new waxy potatoes at Christmas time! Grow your own and enjoy the bragging rights at the Christmas dinner table. When it comes to choosing what variety to grow, it can be confusing to know what to choose… There are early, main and late varieties which have different maturity times and different keeping abilities. If you just want to grow some waxy potatoes for Christmas, choose an early variety such as Jersey Benne, Rocket or Liseta. These varieties tolerate the cool early season and are the quickest to mature. You can get planting in August in warm mild districts, and in early September in cold districts, but will need to protect the tops from late frosts. If you want them for Christmas, you will need to count back to ensure they are planted in plenty of time to produce. They can take 70-90 days. They tend to have lower yields than other varieties and don’t store well for long periods. If you love fluffy roast potatoes and mashed spuds, a main crop variety might be a better choice for you such as the crowd favourite Agria which takes approximately 100 days. Main crop potatoes are best planted in September - October. The later varieties are those that tend to be slower to mature but have high yields and they store well. Heather and Rua are both good varieties if you want to grow and store them in winter. Why do I need to buy ‘seed’ potatoes? Why can’t I use the ones sprouting in my pantry? Seed potatoes are grown in areas that are confirmed to be free of potato viruses that can severely reduce your harvest and you are guaranteed that the variety you grow is the variety that you bought! Where do I grow the potatoes? They will grow best in a warm, sunny spot, sheltered from strong wind. They will fail to thrive or yield if they are in too much shade or are competing for light and moisture. The size of the area depends on the size of your family and if you want to grow enough for storage. They need a free draining soil that has plenty of compost in it. If you have clay or poor draining soils, you will need to raise up the beds at least 15 cm to get good results. Once I’ve bought the seed potatoes - now what? Ideally you will lay your seed spuds out in a tray (an egg carton is perfect) in a cool, light space for a few weeks to encourage them to sprout. This is also called ‘chitting’. They should have strong growing sprouts before you plant them. A week before planting, dig a trench about 10 cm deep and work in some lime. Before planting, work some potato food into the soil and plant them 40-50cm apart. Space the rows about 80cm apart. Potatoes form on the stem of the plant so in order to get a good harvest, a significant amount of the stem needs to be buried. This happens by ‘mounding up’. When the potato tops have emerged to about 20cm high, ‘mound up’ the soil until the tops are almost covered. When the tops grow another 20cm, mound up again. This creates a large mound that the potatoes can grow within. Potatoes can handle some dry weather but if you are not getting some regular rainfall, you should water them regularly. Keep an eye out for - At any time of the growing season, if there are cool wet conditions late blight can be a problem. It spreads rapidly, with brown/black splotches on the leaves turning into complete leaf drop. Apply Grosafe Free Flo copper thoroughly, including the underside of the leaves at the first sign of black spots. Potato psyllid is a relatively new pest in NZ - it looks like a small mosquito/fly. It ruins potato crops by infecting the plants with a bacteria that prevents tuber development leaving you with little or no crops or in the case of late season attacks, leave fully developed tubers with a dark ring in the flesh and a bitter taste. Psyllid aren’t usually present until temperatures are consistently warm so early crops can escape damage but it is safer to spray regularly with a mix of Grosafe Enspray 99 + BioNeem or securely cover with bug netting or a Net Tunnel allowing room for the tops to grow. In areas where psyllid is well established or when growing late season crops the only successful treatment is to cover the crop with bug netting or a Net Tunnel. Written for Gubba by Kelly Jean Reyland from Garden Advice NZ (www.gardenadvice.co.nz)

A firm family favourite, strawberries are easy to grow and don’t take up much room. Why pay high prices at the supermarket when you can enjoy your own home-grown sun ripened berries at home all summer long? Pick a spot that is full sun and has good drainage. A large pot is a good option but remember to water it regularly! When it comes to choosing varieties, older varieties such as Camarosa and Pajaro are ‘short day’, meaning they need a certain number of daylight hours to initiate fruiting. This meant fruiting occurs for a limited period, usually around November - December. Many modern varieties (Albion, Seascape etc) are day-length neutral and fruit over a longer period. Essentially, if temperatures are high enough for fruit to ripen, they will fruit. It is a good idea to plant a combination of both types to get as long a harvest as possible. Strawberries hit peak production at about 3 years old and after that fruiting starts to lessen. Ideally you will have a replacement strategy where you plant younger plants in the 3rd year to replace the older plants and keep fruiting at maximum output. You can do this by buying new plants or potting up runners off the existing plants. Runners are little leaflets that are attached to the main plant by a longer than normal stem. If you pin the leaflet to the ground while it is still attached to the plant, it will form roots at which point you can cut the stem to the mother plant leaving you with a new plant. Runners are a great budget friendly way to increase your number of plants but try and swap some with a friend to ensure some genetic diversity in your plants. If you want to ensure plenty of fruit to enjoy each summer, plant 5 (or more!) plants per person in your household. Producing fruit takes up a lot of energy so make sure that you feed your strawberries with a berry fertiliser at planting time and side dress several times during the growing season. Give them an energy boost regularly while they’re producing berries with a liquid fertiliser that has a high ‘K’ number in the NPK rating on the bottle. ‘K’ is potassium which supports flower and fruit development. Do this every 7-14 days for lots of big, juicy, sweet fruit. Protect your crop! Cover them with bird netting, pin the edges down securely and make sure there are no gaps or they’ll find a way in, or a Net Tunnel or cloche! Make sure you have some cloche hoops or stakes to ensure the birds can’t bounce on the netting and reach the berries through the netting. Trust me – they are clever and determined! When watering, try and water the soil as gently as possible and avoid getting it on the leaves if possible. Water on the leaves increases humidity which creates perfect conditions for fungal diseases to thrive. A weeper hose is a good option to use. If possible, in the garden, plant them up on a mound to ensure good drainage and surround the plants with some pea straw or other mulch to keep the soil moisture in and to keep the berries out of contact with the soil. Give them a preventative spray with a copper spray a few times through spring when humidity is higher to help prevent any fungal diseases getting established. Plant your own strawberries and enjoy the flavour of sun ripened, delicious, sweet berries. It's a great way to get kids and grandkids involved the garden, picking and eating them! Written for Gubba by Kelly Jean Reyland from Garden Advice NZ (www.gardenadvice.co.nz)

Dahlias have certainly come full circle after falling from grace from the 60’s - 90’s during the rise of formal and then minimalistic garden design. There was no room in the garden for these bright, exuberant blooms. Over the last decade they have crept back into fashion with social media, in particular Instagram and the rise of home flower farmers bringing the gorgeous blooms to our attention causing their popularity to skyrocket over the last view years. Dahlias have grown so popular they have been compared to Holland’s ‘Tulipmania’ in the 1700’s. They certainly deserve their time in the sun. Dahlias have wonderful range of shapes, sizes and colours. From dinner plate sized in vibrant hues through to tiny pom poms in delicate pastel, there is something for everyone’s taste. They repeat bloom from mid-summer through to mid-autumn. They are straight-forward to care for and they look stunning, in the garden, as cut flowers, dried on a wreath or in a display. You should consider the space in your garden when choosing your varieties. The dinner plate varieties take up quite a bit of space and the weight of the sizeable blooms, have a tendency to flop if not securely staked. The cactus and decorative varieties while smaller in flower can also take up a lot of real estate in your border and they can be quite tall. If the position is not sheltered from wind, staking is highly recommended. If space is limited or you’re planting in pots consider the pompom, gallery, anemone or collarette varieties that tend to be smaller in plant size and bloom size. A dahlia grows from a tuber in the ground. It dies down completely in winter and resprouts in spring. To avoid the tuber rotting if your soil is heavy and wet over winter, it is highly recommended that you lift the tuber after it dies down and you store it in a cool, frost free spot over winter. Replant in the spring. If the tuber is in well drained soil or a raised bed, you can leave it in place but ensure it is well protected from frosts with a thick layer of compost or mulch. Lifting the dahlia tuber does give you the opportunity to inspect for damage, or to divide the tuber into multiple new plants. You simply need to ensure that there is an ‘eye’ or sprout on the section of tuber you are going to divide off. There are usually multiple eyes on a tuber. This is a great way to increase the number of plants you have or to share different varieties between friends. Alternatively, you can purchase specific named dahlia varieties from a garden centre in mid winter. How to get the best performance out of your dahlias? Feed them well with a bulb food when they are beginning to sprout and after they finish flowering and start to die down. This will give the plant a boost to start its season and to help the plant store food in its tuber at the end of the season. Once it is in full growth, feed with a fertiliser for flowers such as rose fertiliser or one with a high balanced nitrogen and potassium levels on the NPK rating. This is to support plenty of blooms. Remember to deadhead the finished blooms to encourage the plant to flower again during the season. In terms of pests and diseases, there are a few to keep your eye out for. Regularly checking in on your dahlias is key to putting a stop to any problems before they become a real issue. As soon as you see the first sign- do something about it! Physically remove the insect or affected part of the plant to slow the spread or stop it completely. Follow up with an appropriate spray. Slugs and snails will make fast work of the new shoots so ensure you spread some bait around to protect them in early spring. If you head out at night with a torch you will catch them in the act! If the petals are ragged, earwigs are probably to blame or if there are holes in the centre of the dahlia and petals but no slime trails, take a closer look and you’ll spot a very hungry caterpillar munching away. Removal is the easiest control for caterpillars, otherwise apply a spray that controls caterpillars. Earwigs are harder to control, they are nocturnal and they like to hide so remove any potential hiding places and provide one with a damp rolled up newpaper tied with string that you can get rid of them from daily . Mites and thrips can be an issue at times, thrips cause a light flecking on the petals, mites are hard to see but cause a mottling on the leaves. Grosafe BioNeem or Groventive will provide control for these. The disease that can be a common occurence on dahlia leaves, especially in warm humid weather is powdery mildew. Silver powdery blotches on the leaf surface that can spread quickly if left untreated. Removal of the affected leaves at first sight is the best control/prevention. If it has started to spread, Grosafe Enspray 99 is effective at smothering spores on contact so thoroughly spray the foliage. You will need to repeat if it appears again. Good airflow through the plant is helpful in prevention so you may need to thin out some foliage if the plant is particularly crowded. Watering the soil and not the foliage will also help prevent it. Dahlias are a wonderful addition to your garden, with plenty of colours, shapes and sizes to choose from. Whether they are colour for the garden or for picking to enjoy inside, they will bring you much pleasure. Written for Gubba by Kelly Jean Reyland from Garden Advice NZ (www.gardenadvice.co.nz)

Winter is the ideal time to carry out a clean sweep, and get on top of any lingering insects or fungal spores from the previous growing season. They can hide in cracks, in plain sight on the stems or in the fallen leaves around the base of the plant. They go dormant, waiting for warmer weather and the chance to make a comeback next spring. Start with the basics: Collect the fallen leaves from around the base of any plant affected by fungal disease or insect during the growing season. Spores and eggs can remain on leaves so if you get rid of these, part of the battle is already won. Ensure that you throw them in the bin or burn them. You don’t want to put them in the compost bin. Home compost rarely gets hot enough to kill off fungal spores. You don’t need to collect up every fallen leaf on your property, just the affected ones. What sprays do you use for a winter clean up? A copper based fungicide is used to clean up spores and create a protective layer over any cuts or wounds on the tree and a spraying oil insecticide smothers any scale insects present on stems, or insect eggs present on the plant. These were traditionally combined and applied together but the current recommendation is to apply them separately, waiting 1 week between applications. Not all sprays are created equal. Copper hydroxide (sold as ‘FreeFlo copper’) has the smallest copper particle size which gives it increased coverage, rain fastness and longevity. That equals better protection and disease control for your plants compared to other copper sprays on the market. Among the available oil insecticides, Enspray 99 oil stands out for having the smallest particle size which again improves coverage and control of pests. The improved coverage also gives it the added ability to smother powdery mildew spores. The 99 in the name refers to it being 99% pure of impurities which significantly minimises the risk of burning when applied. A lesser used winter spray is lime sulfur. As a winter spray and at winter application rates, it is generally only used on deciduous plants as it will cause defoliation (leaf drop). It is useful to help force deciduous plants that are slow to drop their leaves into dormancy and it cleans up lichen off stems and controls scale, mites and fungal diseases. It is effective but it is messy, and you have to be very careful with its application and minimise spray drift onto surrounding evergreen plants that can be burnt. It is really important to note that this spray can’t be used within two weeks of copper or oil sprays. When do you carry out winter clean up sprays? Ideally at the end of autumn, when the trees have dropped their leaves, copper and oil sprays are good to seal all the tiny entry points into the tree, created by the dropping leaves. They protect against fungal disease and clean up any pests that are still present. Follow up with another application later in winter before the spring growth starts. For roses, spray after pruning has been carried out in approx July (If they refuse to drop their leaves, lime sulfur can be applied at least two weeks before pruning and spraying with copper/oil, forcing them to drop their leaves and go dormant). Do another follow up application of copper/oil before spring growth starts. For fruit trees - especially peaches and nectarines that have had leaf curl - Spray with copper at bud swell and repeat 14 days later. Prevention is such an important step in keeping our plants healthy and thriving. Winter clean up sprays are an important step in this process. Remember - ‘A pinch of prevention is worth a pound of cure!’ Shop Garden SprayersShop Weed & Pest Control Written for Gubba by Kelly Jean Reyland from Garden Advice NZ (www.gardenadvice.co.nz)

Hydrangeas are the shrub that can always be relied upon to put on a good show in part – full shade positions. In the past we were limited to the standard ‘mop top’ or ‘lace cap’ varieties but we now have more varieties available to us such as Oakleaf, Panicle, Smooth and climbing options. It is important to correctly identify what variety of Hydrangea you are pruning. This will guide you how and when to prune your variety correctly as different varieties are pruned at different times and if you get it wrong, you may miss out on blooms that year. First things first; when pruning always start by removing any branches that are dead, damaged or diseased branches. Bigleaf Hydrangeas ‘Mop top’ flowers (Bridal Bouquet’, ‘Raspberry Crush’ etc. ) and serrata with ‘lace cap’ flowers ‘Blue Deckle’ and “Libelle’ are some of the cultivars available. Flower buds form the previous growing season, at or near the ends of the branches – easily recognisable as ‘two fat buds’ on the stems in late winter. If you cut back beyond them, you will forfeit your blooms for the upcoming summer. In areas with harsh winters, leave the old flower heads on the bush to protect the fat buds from the winter cold. Prune in spring, cutting the stems back to just above the ‘two fat buds’. If you need to bring the height of the bush down, you will need to prune in late summer well before next years flower buds have formed on the stems. You may have to sacrifice some blooms to make the cuts. If the bush is getting crowded, thin out some of the excess twiggy branches to let air and light into the bush. Oakleaf Hydrangeas ‘Pee wee’ and ‘Snowflake’ are some of the cultivars available. Grown for their stunning large red, oakleaf shaped leaves as much as the white panicle flowers. Prune the same way as the bigleaf hydrangeas back to ‘two fat buds’ unless you are more interested in the foliage, in which case cut the stems back one quarter in late spring to stimulate leafy growth and forfeit the flowers. Panicle Hydrangeas ‘Limelight’, ‘Candlelight’ and ‘Bombshell’ are some cultivars available.These varieties bloom on new seasons growth so prune in late winter-early spring, between the last heavy frosts and before it starts to shoot new growth. The buds should be swelling so you can tell if any have died during the winter and need removing. Cut back each stem by about one third, to just above a ‘node’ - where the buds swell and form. Trim out any weak, wispy growth to focus the plants energy into the bigger branches for a stronger plant and better show of blooms. Smooth Hydrangeas Such as ‘Annabelle’. These also flower on new seasons growth, so follow the steps for pruning panicle hydrangeas above. Climbing Hydrangeas ‘Petiolaris’ climbs by attaching itself onto a support structure or wall. Prune in early spring before growth begins. Cut back overly vigorous branches and shorten flowering stems that are growing outwards from the support structure. The vine flowers on new shoots so light pruning to stimulate growth is beneficial for more blooms. Pruning your hydrangeas will encourage blooms and improve the health of the plant by removing dead or diseased branches. It will enable you to control the overall shape and size of the plant, keeping it happy and healthy. Shop Pruners & Secateurs Written for Gubba by Kelly Jean Reyland from Garden Advice NZ (www.gardenadvice.co.nz)

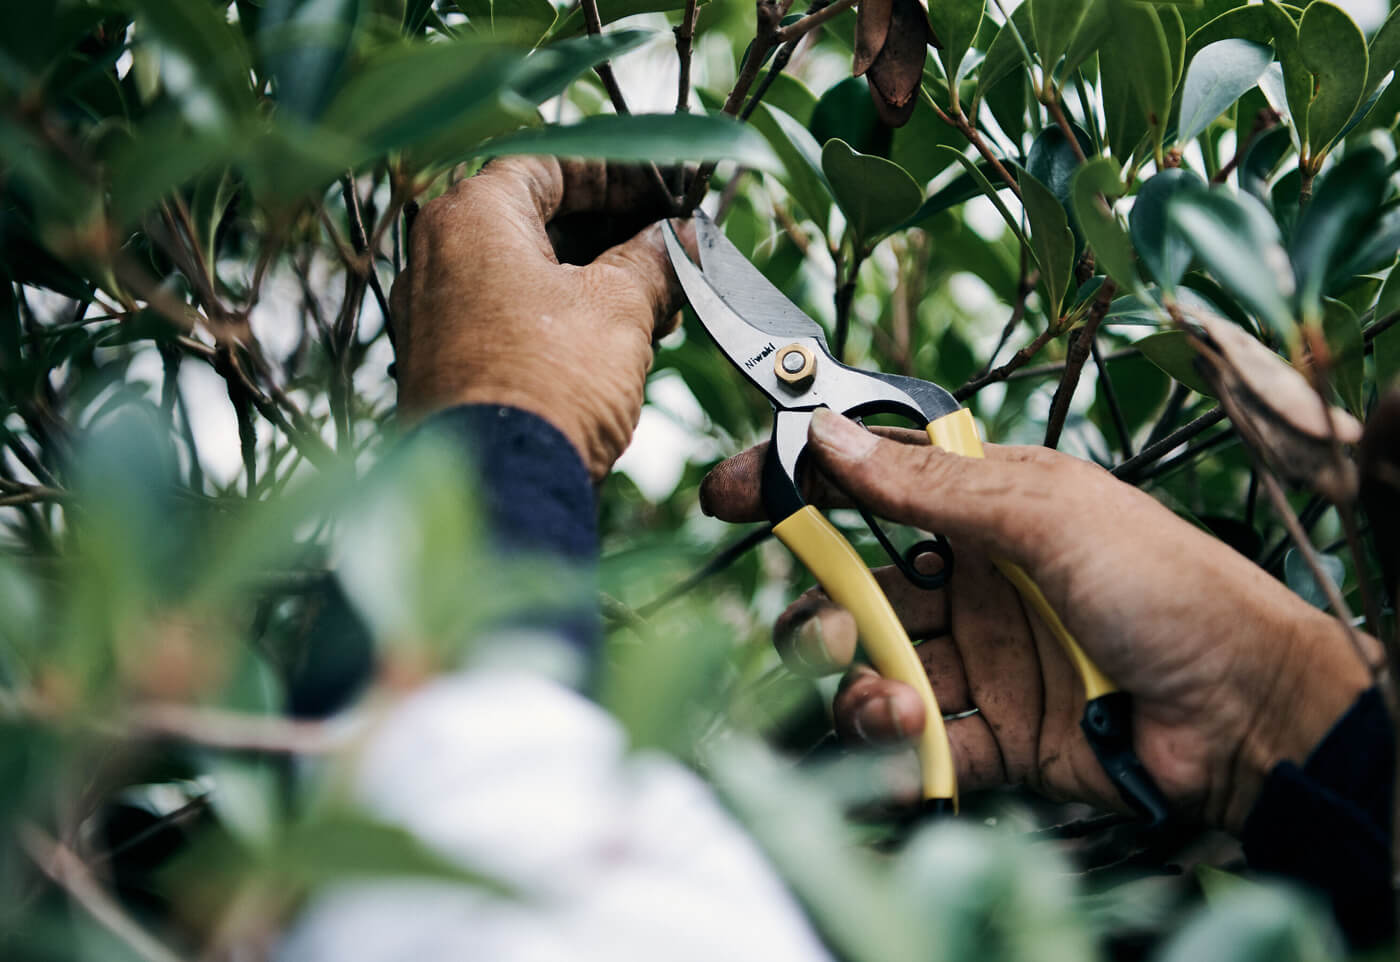
One job that we should never brush off as unimportant - particularly for fruiting plants and trees - is pruning. Why do we prune? We prune for health, for size, for beauty, for harvest and for pleasure. So yes, it’s quite important! In this blog we look at berry fruit specifically. At the very basic level, pruning lets in air and light and removes dead, dying or diseased branches. This helps improve the overall health of the plant and reduces the chance of diseases. Anyone who has seen an ignored raspberry bush will understand how crowded they can become, and we have all seen blackberries and brambles smothering other plants on the side of the road, left to their own devices. More specifically for fruiting plants, pruning helps to remove branches that will no longer fruit and are simply diverting energy from fruit production. It enables us to control the number of fruit (thinning) which improves the size and sweetness of the remaining fruit. Removing excess stems and branches also enables the maximum amount of sunlight into the plant or tree which is converted into food for the plant. The vital piece of information you need before pruning your berry plant is what year wood does the plant produce its fruit on. What does that mean? - First year wood means the fruit will only develop on new growth from this spring, e.g. blueberries, double fruiting / everbearing raspberries - summer harvest - Second year wood means the fruit will develop on wood that grew last spring, e.g. blackberries / brambles, currants, black currants, raspberries - single harvest, double fruiting (everbearing) raspberries – fall harvest - Third year wood means the fruit will develop on wood that grew in spring two years ago, e.g. currants Pruning It’s pruning time (after you make sure your secateurs are sharp and clean!). It's good practice to start by removing the 3 D’s: dead, dying or diseased. This will simplify your job going forward... Blackberries/brambles - Fruiting on second year wood, the long canes will die after fruiting, leaving a strong bud at the base of the dead cane or a completely new shoot from the base. Cut the cane back to the bud or remove completely if there is a new shoot from the base. Do this when they are dormant. Also remove excess new canes, leaving only six or so of the sturdiest and healthiest canes. Grow them against a support frame to enable control of the shape, enable easy pruning and easily access the fruit. Shorten the new canes to encourage side shoots which will fruit next spring. To help make pruning simple, you can train the first-year canes (next year's fruiting canes) in one direction along a trellis and have the fruiting canes trained in the other direction. At the end of the fruiting season, you can remove all those fruited canes, leaving room for the new canes. Blueberries - Fruiting on first year wood, in the first three years, the only pruning they need is removing dead and diseased wood. Highbush varieties will keep growing new stems / branches for 6 years, so the first step is to remove any stems more than six years old. After that trim back young or spindly stems to strong branches or buds and remove older twiggy growth. Rabbiteye varieties are more vigorous growers than high bush so prune them similarly but don’t cut them back too hard to avoid stimulating excessive growth. Black currants - They bear their best fruit on second year wood so when they are dormant remove the stems that have fruited, right to the ground or to a low, strong side shoot that will grow a new stem. Thin out one-year stems to the ground, leaving just 6 of the strongest, upright stems, to avoid crowding. Raspberries (single harvest varieties) - Simply remove the canes that fruited this season and leave the new canes to fruit next season. You can usually see where the berries have been attached or by the colour. The canes to remove are matte brown/grey. The canes to leave are green/brown. Double harvest varieties - These fruit at the tips of first year canes in late summer and autumn. These same canes will fruit the following season in early summer lower down the cane. You can remove the tips after they fruit the first time, leaving the lower cane to fruit again. After the second harvest lower down on the canes, remove the entire cane from the base. Leave the first-year canes. There are few foods that compare to the taste of homegrown, sun-ripened berries. Grow your own and as you learn how to care for them you will enjoy many years of delicious berries! Written for Gubba by Kelly Jean Reyland from Garden Advice NZ (www.gardenadvice.co.nz)

A well-kept lawn looks great and helps the surrounding area look better. And one of the ways to help your lawn look its best is to keep it weed free! One of the best pieces of advice you can take regarding weeds (also pests and diseases) is to deal with the issue when you first see it. The issue will only get worse with time; that's pretty much a guarantee! So, when you first see that patch of creeping oxalis, the prickly seed heads of onehunga weed or the distinctive rosette pattern of cape daisy leaves, do something about it. It might be just removing flower heads or seed heads so it can’t spread while you deal with the leaves and roots. Or it might be getting straight out there with some weedkiller to knock it dead. Don’t leave it there to spread and become a bigger problem! Follow this up by keeping the lawn well fed so it is thick and can easily compete with any weed seeds that attempt to germinate, and finally mow your lawn on a high setting, so the lawn is dense and helps prevent weed seeds finding a spot to germinate. Weed control Some weeds are easy enough to remove manually. The cape daisy is a good example. As long as the soil is moist, you can use a daisy remover to gently lever the entire long tap root out of the ground and in one go remove the entire plant. It makes sense to do so when you learn that all the little fragments of each cape daisy leaf created and spread by being run over with the lawn mower can grow into an individual plant. When a weed has appeared in the lawn in a small, isolated position, it is effective to carefully spot apply a non-selective weedkiller and once the weed is dead, resow the patch with grass seed. Once a weed has spread through the lawn, the most effective way to get on top of the issue is applying a selective lawn weed spray that is appropriate for the specific weed. Ensure that you follow the instructions for how much to apply to how many square metres of ground to avoid burning the grass. Be aware that most selective lawn sprays are hormone based which work by disrupting cell division or disrupting photosynthesis. It is really important that you don’t put the lawn clippings in the compost or as mulch around existing plants as the hormone will reside in the material for months to come and will affect other plants negatively e.g., putting the compost containing the broken down clippings on your vegetable garden or around your roses and the plants failing to grow or thrive with rolled up, curled leaves. It will state on the instructions how long the clippings need to be put in the rubbish before it is safe to resume doing so. You also need to be aware of the surrounding gardens when you apply the spray. A broadleaf weed spray will work on a ‘weed’ or a broadleaf plant, so you need to be very careful with spray drift. It is good practice to hose off any particularly special or important plants if there is any risk of spray drift after spraying. You also need to consider where trees and shrubs overhang the lawn as their roots will come into contact with the spray and it can knock them back in their growth. Weedkillers fall into two groups – selective and non-selective. Lawn spray is an example of selective where it will kill off broadleaf plants but not the blades of grass when applied at the correct application rates. Glyphosate is an example of non-selective where it will kill off anything it comes into contact with. Unfortunately, any grass weeds such as paspalum or twitch/cooch can’t be controlled by selective weedkillers as they are a grass rather than a broadleaf. They need to be controlled with careful application of nonselective weedkiller. Some professional lawn care companies do have sprays that control certain weed grasses in a lawn, but they are not available to buy off the shelf for home gardeners. If grass weeds are widespread in the lawn, getting a quote from a lawn company could be the most cost-effective way to get it under control. Within the non-selective group there are also contact and systemic sprays. Contact sprays will burn off the tops but leave the roots intact. Natural oil or fatty acid style sprays fall in this category. They are effective for very young weeds without established root systems but established perennial weeds will simply grow back from the roots. Systemic sprays will be absorbed through the leaves into the sap system and travel back through the roots killing off the entire plants. This is a much more effective method with established perennial weeds. Moss in the lawn Moss can be caused by several environmental factors. Poor drainage / excessive water, too much shade, soil pH being too acidic or poor soil fertility. These are things that should be addressed as well as treating the moss growth. If you don’t treat the cause of the issue, the moss will simply grow back. Poor drainage or excess water can be improved by adding gypsum to help improve soil structure or adding drainage to the area. In a shady area, you can look at a shady lawn blend which is better suited to the area or look at an alternative to lawn for ground cover. Acid soil pH can be addressed by regular application of lime and altering the soil pH can make nutrients in the soil more available for the plant to access and use. Lawn fertiliser with added iron sulphate will add nutrients to the soil and help control moss growth. Be careful not to get it on hard surfaces as iron sulphate will stain them. Maintain your lawn's good looks by keeping weed and moss growth under control. In combination with regular feeding and care it will be an asset to your property. For tips on lawn care, including sowing, watering and fertilising – see our blog on Caring for your Lawn. Browse some top Lawn Care products here! Written for Gubba by Kelly Jean Reyland from Garden Advice NZ (www.gardenadvice.co.nz)

Autumn is a prime time to get your lawn looking its best. There is still warmth in the air and soil and there is moisture available in the soil for optimal growing conditions. If you are looking to sow a new lawn, now is the time! Get your seed spread as soon as possible before the winter cold halts growth. Smooth out the soil so you have an even surface and remove any weeds. Your preparation now will affect the finished lawn. If you have time to leave the soil bare so any weeds seeds germinate and you can spray them off and remove them, do so. This helps to ensure your lawn will have less weeds competing with your lawn seed as it starts to grow. If you can repeat that process a few times it will be an even better final result, but you do need to get that seed growing so be as fast as you can with winter approaching. If your soil is very sandy or heavy, spreading a layer of lawn soil is a good base to get the seeds started. You buy it bagged, it is weed free, has water holding crystals to help maintain an even soil moisture while seeds germinate, and it has some appropriate fertiliser. If you have an existing lawn and you have shallow dips that you need filled in to even out your lawn, lawn soil is an excellent option as it doesn’t settle at a lower level. Choosing the right lawn seed mix for your situation is important to get the finished result you want. It is uncommon to get a lawn seed that is one single type of seed other than Kikuyu for very sandy situations or perhaps a Chewings Fescue for an ultrafine lawn. Most seed blends have different combinations to give the finished attributes that you want in the lawn. Lawns where there are kids or dogs running around or vehicles driving on the lawn have a coarser blade of grass (such as brown top) which stands up to the wear and tear. If you have shady spots, a hot and dry situation, a desire for a super fine, trophy lawn or just a regular lawn, choose a mix that is suited for that purpose. These blends will generally grow strongly in the warmer months and very little over the cold months. If you are in a situation where the lawn gets hard wear and tear all year round and has the potential to turn into a mud pit in winter, look for an all-season blend that grows during the cold months as well. It does mean you have to keep mowing your lawn in winter, but any damage has a chance to be repaired and the lawn regrows at any time of year. This is the blend they use on sports fields. Once your lawn seed has germinated, ensure that you oversow to fill in any patchy areas and ensure a thick, even lawn. Watering your lawn Lawns can use up a lot of resources in terms of water, but there are a few things to keep in mind. Most people over irrigate their lawns which can cause plants in surrounding gardens to die from overwatering – especially on heavy or clay-based soil. Reduce your watering to a longer time and further apart rather than a light water every other day. The finer the blade of grass the more water it requires, so if you want to reduce your water use over summer, oversow with a more drought resistant, coarser blade of grass and leave it cut higher during the summer months. If your lawn is on an automatic watering system, regularly check if the soil needs watering. If the soil is damp, it's fine, it doesn't need more water. An automatic system can’t tell if it has rained, and if water is not needed. That’s up to you! Mowing your lawn The lower you cut your lawn, the higher the risk of damage or death over summer with high temperatures and minimal rain and the higher the risk of weed invasion. If you mow your lawn higher, it is more resilient to heat stress and there is more competition to keep weeds at bay. Maintain the blades on your mower and keep them sharp to ensure a clean cut of the grass. Feeding your lawn Be aware that a new lawn is very soft and easily burnt by fertiliser or weed spray so you need to use a fertiliser specifically for new lawns that will be slow release or use a gentle option such as liquid seaweed for the first six months. What type of lawn fertiliser should I use? The three main options are slow release, granular and liquid. All have pros and cons. Slow release options are expensive, however a little goes a long way and lasts a few months. As it releases slowly the grass is fed consistently over a long time and it is not wasted. Follow the application instructions to apply the correct amount to the correct area size. Granular options are inexpensive but they can burn if they are applied too heavily. They also release on contact with water (this is why you need to water them in) which gives them a big feed at once but also has a high chance of leaching away and therefore be wasted. Liquid feed is easily applied and taken up quickly – an instant boost – but it is also used up quickly, so it must be applied regularly over the growing season. It commonly has a weedkiller included in the formulation to kill off weeds and the fertiliser then encourages the grass to grow and fill the space. For tips on weeding your lawn – see our blog on keeping your lawn weed free. Our lawns are an important part of how our homes are presented and we use our spaces. Keeping them looking good and functioning well will make a positive difference in how we use them. Browse some top Lawn Care products here! Written for Gubba by Kelly Jean Reyland from Garden Advice NZ (www.gardenadvice.co.nz)

