

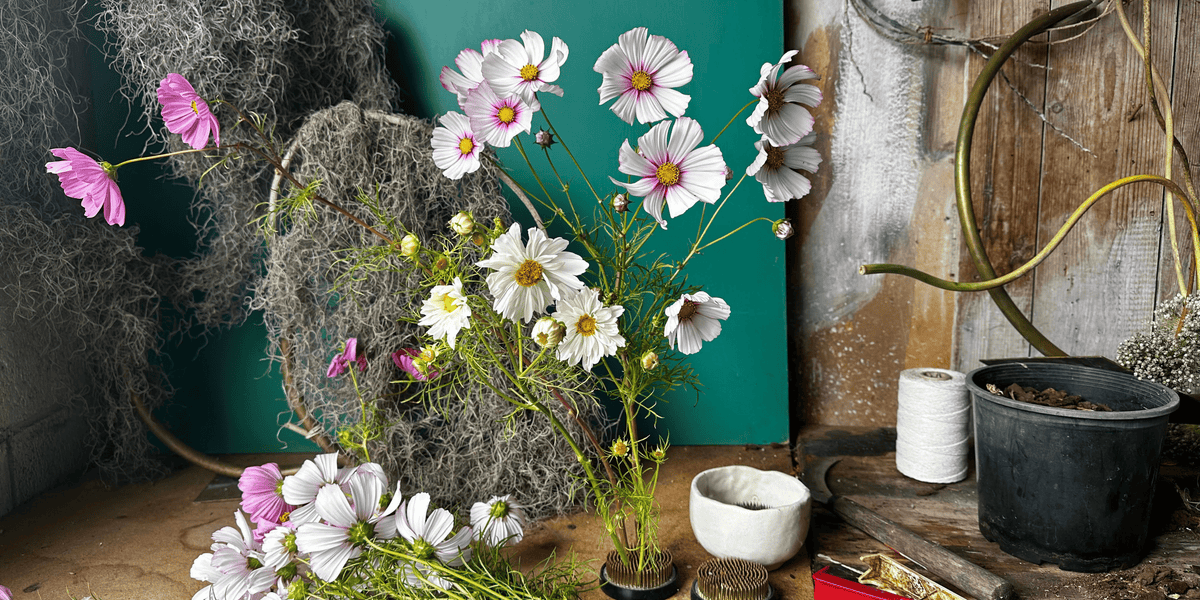
There is a particular kind of smug that comes from putting a jug of flowers on the table and saying, when asked, "Oh, those are from the garden." We would like that for you.
A cut flower patch sounds like a project for people with acreage and a flower farm Instagram account. It isn't. A sunny metre of dirt, a few packets of seed and a good pair of scissors will keep a vase going from early summer into autumn. Here is how to start one this spring.
Why grow your own
A shop bouquet may well have been grown on the other side of the world. The 'Slow Flowers' movement, a phrase coined by American garden writer Debra Prinzing in her 2013 book of the same name, makes the case for flowers that are local and seasonal. Nothing is more local than the back step. Homegrown stems go into the vase hours after cutting, not days, and you get to choose colours no florist would dare put together.
Pick the patch
Cut flowers want sun more than they want space. Aim for at least six hours a day, somewhere close enough to the hose that watering never feels like a hike. Put it where you walk past often, because a patch you see is a patch you pick.
It does not need to be a formal bed. A row along the edge of the vege garden works, and so do the gaps in an existing border. Pots are fine too, as long as they are the biggest you can find, because small pots dry out fast in summer.
What to do: Find the sunniest spot within reach of the hose and mark out a patch about a metre square to start.
Get the soil ready
Weed by hand. It is slower, but you learn what your soil is like, and seedlings root far more easily into ground that is loose and clear. A Hori Hori will dig, weed and mark out rows in one tool, and the Wonder Weeder handles the fine work between plants.
Once it is clear, loosen the top layer, spread a generous layer of well-rotted compost over the top and rake it to a fine crumb. Skip fresh manure. It is too rich for young seedlings and complicates things you do not need complicated.
What to do: Weed by hand, loosen the top layer, spread compost over the top, then rake it smooth enough to sow into.
Four flowers to start with
Cosmos. The easiest of the lot. Sow now into trays, or straight into the ground once the soil has warmed. Tall, airy and mostly in whites, pinks and crimsons, cosmos will flower all summer if you keep cutting it.
Zinnias. The one that needs patience. Zinnias want warm soil, above 20°C, so most of New Zealand sows them in October or November, and cooler southern gardens are better waiting until November. They also dislike having their roots disturbed, which makes them a natural fit for soil blocks. Give the tall cutting varieties about 30cm between plants.
Strawflowers. Also sold as paper daisies. Papery, jewel-coloured petals and a long season in the garden. Sow in spring once frosts have passed, in full sun and very free-draining soil. Anything you do not put in a vase can be hung upside down to dry for winter.
Sweet peas. The honest entry. If you sowed them in winter, you will be cutting armfuls from October. If you did not, put June in the diary and read our sweet pea sowing guide now.
What to do: Start with cosmos now and hold your zinnias until the soil is properly warm, usually October or November.
Sow direct, or start in blocks
Sowing straight into the patch is the simplest option. Follow the depth and spacing on the packet, mix fine seed with a little dry sand so it spreads evenly, and keep the soil damp but not sodden until seedlings appear.
For zinnias, or for anyone who wants a head start, soil blocks are worth the effort. A Ladbrooke soil blocker presses compressed blocks of seed-raising mix with no punnet at all. The Mini 4 makes four 5cm blocks at a time. Roots stop when they reach the air at the edge of the block instead of circling, so seedlings go into the ground with far less transplant shock. Our soil blocking guide covers the mix and the method.
Before planting out, harden seedlings off. Give them a few hours outside each day, building up to a full day over about a week. Plant out once they have a couple of sets of true leaves.
What to do: Sow zinnias one or two seeds to a 5cm soil block, harden them off over a week, then plant out.
Keep it cutting
Water every day until plants are established, then water deeply and less often. Mulch around the base once they are up, and keep an eye out for slugs and snails early on.
Here is the part nobody tells beginners: the more you cut, the more you get. Pinching out the growing tip of cosmos and zinnias when they are young makes them branch, which means more stems. After that, cut every few days in the cool of the morning with a sharp pair of flower scissors.
Anything you miss, deadhead before it sets seed. You get more flowers, and nothing wanders off into the neighbour's lawn. If you are unsure whether something self-seeds too freely where you live, your regional council's pest plant list is the place to check. You will spend a fair bit of time down at bloom level, so a decent kneeler is a kindness to yourself.
What to do: Pinch out the growing tip once plants have three or four pairs of leaves, then cut in the morning, every few days.
Bring it in
Strip every leaf that would sit below the waterline, because leaves in water rot and cloud it. Recut the stems on an angle before they go in, use a properly clean vase, and change the water every couple of days. That is the whole secret.
What to do: Strip every leaf below the waterline, recut the stems and change the water every two days.
Expect a few failures. Something will sulk, something will get eaten, and something will come up where you did not sow it. That is gardening. The vase will still be full.
Keep reading
- How to Grow Sweet Peas in NZ | A Winter Sowing Guide
- A Quick Guide to Soil Blocking for Vege Gardeners
- What Are Hardy Annuals? A Comprehensive Growing Guide
Premium products for people who live in the garden.


