

News
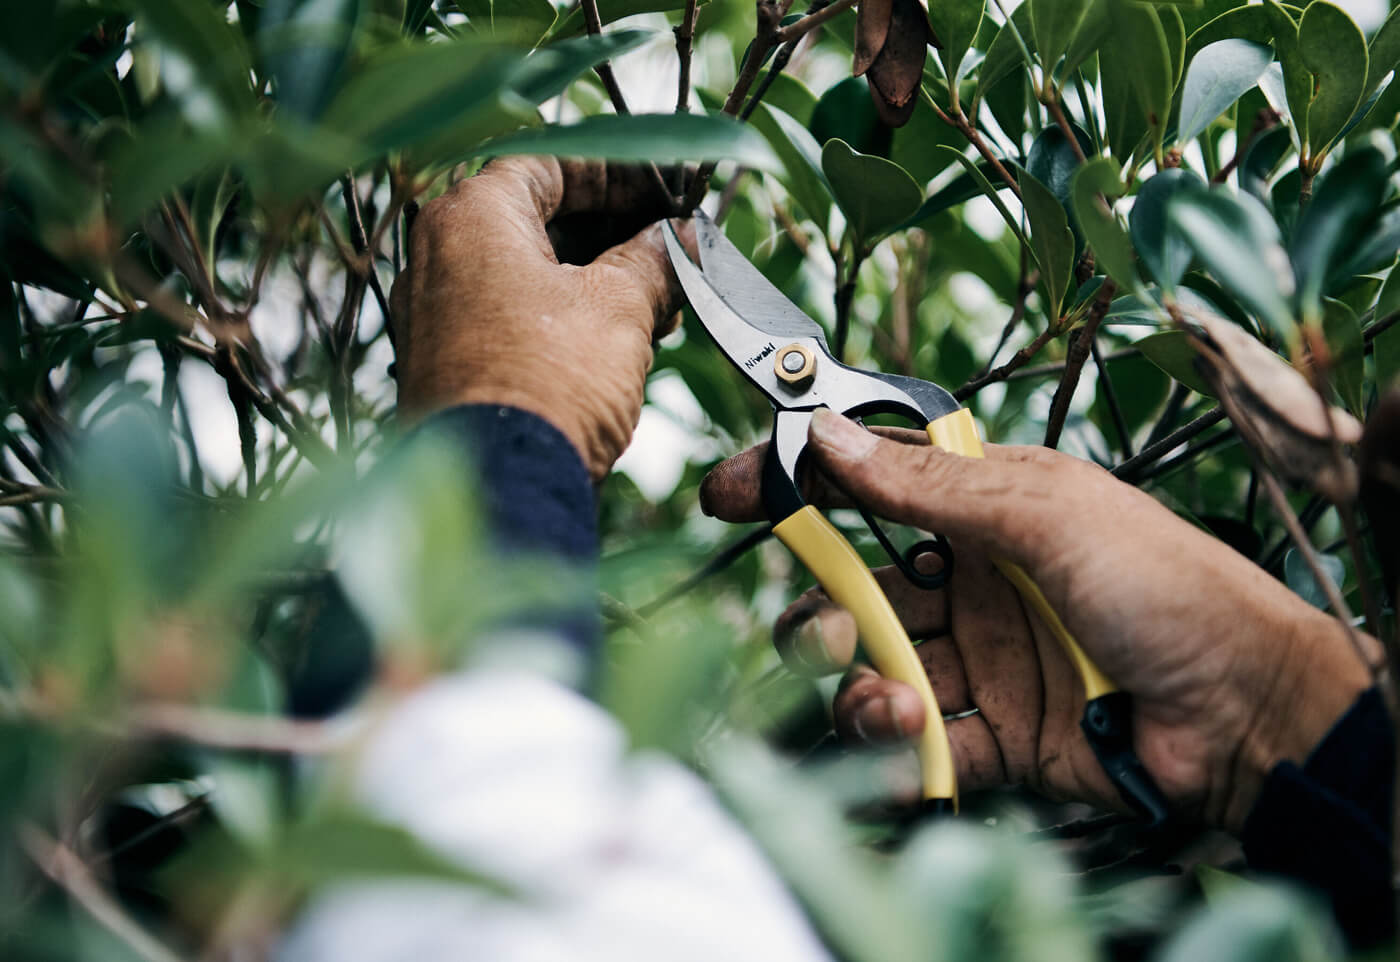

Naturalists use ‘wintering’ to describe the way animals survive the cold months. Some hibernate, others migrate. As tempting as these strategies might be for us, I think we better weather winter well if we truly engage with it. And that means getting outside, feeling the cold and absorbing as much of the weak sunlight as we can before returning to the fire to get cosy again. And we gardeners, more than most, are well poised to ‘winter’ well. There is no doubt that the garden is a slower, gentler presence in the gardener’s world in winter. But while the uninitiated might assume it slows to a stop, those of us who’ve planted bulbs in spring, or inherited a slipper orchid, or nurtured a daphne bush know there is still life and glory to behold in the midst of the coldest days. In contrast to the other seasons, with their bursting buds, flashy blooms and blazing colours, perhaps one of winter’s more precious gifts is to invite us to look a little closer, to pay a little more attention, to notice the finer details. Instructions for living a life:Pay attention.Be astonished.Tell about it.— Mary Oliver For this gardener, as well as embracing the brisk morning wander to look for signs of life in the tulip bed, ‘wintering’ involves bringing the outside in, so we can pay attention and enjoy it up close. There are the bowls of dainty, blue iris reticulata – a true winter bulb, with swelling spears making their appearance from mid July. The single potted hellebore on the kitchen cabinet, whose antique hues change from cream through dusky pink and then green over six weeks or more. And the kitchen windowsill herb planters that bring the garden’s constant vitality front and centre above the kitchen sink. Other winter delights to bring close and be astonished by: Pick strawberry flowers (winter flowers steal your plant’s energy when they should be focussing on root development. Lucky us!) A branch of magnolia A vase of paper whites (always the first narcissus for me) and the first of each successive spring bloom Other petit bulbs in a bowl – Daffodil ‘White petticoat’ andcrocus are good options (make a note in your calendar to bowl-plant petit bulbs next autumn!) So get out in the cold, pay attention, be astonished, and bring some of it back inside to enjoy up close. We need both to winter well. How to grow windowsill herbs in winter LocationThe windowsill is the key to success here, as with all plants: light is life. I find my south facing windowsill works just fine with a 180° spin each couple of days to keep them growing straight. What you need: ● Sill-sized pot without a drainage hole (trough vases fit a sill nicely)● Small stones to line the base● Potting mix● Coconut coir● Small potted supermarket herbs● Liquid fertiliser How to do it:Submerge herbs in a bowl of water with liquid fertiliser added until bubbles stop ensuring they’re well hydrated Cover the base of your pot with small stones – this provides a degree of drainage for plant roots Mix equal parts potting mix and coconut coir, and add roughly 2cm to the base of the pot Remove herbs from their pots and if necessary, gently manipulate the root ball to fit inside the pot. Backfill around the plants with the soil/coconut mix, ensuring all roots are below the soil and water sparingly to moisten the additional soil. Note. Parsley often comes packed with 8+ plants, these will quickly crowd each other out so gently divide the ‘plant’ in half and pot the others separately to give away or out in the garden. Maintenance Being winter, watering requirements will be minimal, a weekly touch test to check the moisture in the soil will let you know if you need to add water or leave it be. In such close quarters competition for nutrition will require a fortnightly feed with liquid fertiliser – a dash in ½-1C of water will be sufficient. Basil is best harvested by snipping out the growing tips to encourage bushier growth, more leaves and a longer harvest period. Initially mint is best harvested by snipping the growing tips, then once established, by cutting the whole stem back to the soil promoting new growth from root nodes. Parsley is best harvested by snipping the outer leaves right back to the main stem allowing the new leaves at the centre of each plant to grow on. Chives can be snipped at the soil to promote new shoots. A note on coriander: being such a tender plant and not suited to transplanting, it is best grown from seed and can be grown as a microgreen on the sill alongside your other herbs.

Planting perennials, propagating new plants and putting the perennial garden to bed for autumn and winter. Autumn is nature’s final flourish, bringing a golden hush to the garden as blooms fade and seed heads stand tall. There is beauty in this quiet decay, but with shorter days and rain setting in, you may notice your garden beginning to sag under the weight of fallen leaves and plant remains. When it’s time to put your garden bed to rest, it helps to know which plants need pulling out and which are simply due for a seasonal trim. A well-rounded garden often contains both annual and perennial plants, and they have quite different needs in autumn. In this guide, we’ll focus on perennial plants — what they are, how to care for them, and how to make the most of this transitional time of year. What is a perennial?A perennial is a plant that lives for more than two years, returning reliably each season, often with more vigour. You may have heard the phrase: “First year sleep, second year creep, third year leap.” This refers to how perennials typically take time to establish. Slowly in the first year, spreading in the second, and thriving by the third. Compared to annuals — which complete their life cycle in one season and need replanting next year — perennials are more reliable and require less long-term maintenance. When is the best time to plant perennials? That depends on the type of perennial and your local climate: Frost-sensitive perennials (like Salvia or Scented Geranium) are best planted in spring, especially in regions where winter temperatures dip below zero and there is risk of ground freezes. Dormant winter perennials (perennial flowers like Echinacea or Agastache) can be planted in early autumn to mid-autumn, before they die back for the season. Just remember where you plant them! (This is where plant tags can come in handy.) Herbaceous perennials and woody shrubs (like Achillea or Hydrangea) are perfect to plant in autumn. The cooler temperatures allow the root system to establish without the stress of the hot summers, and increased rainfall means less watering for you — win-win! Perennial pruning tipsPruning perennials can be a personal preference, but there are a few general guidelines worth considering: For a tidy look: Cut back perennials in late autumn, then finish with a layer of mulch for a clean, formal feel. For visual interest and to encourage local wildlife: Leave seed heads and dried stems in place through the winter months. They provide food and habitat for birds and insects, and add structural winter interest to the garden. Prune in late winter instead. For tender varieties: Delay pruning until after the last frost. The fresh growth of plants like Salvia or Penstemon may suffer if cut back too early. How to prune perennials: Use sharp, clean secateurs or garden knives Identify if the plant is herbaceous (soft plant stems) or woody. For herbaceous plants: Cut dead, brown material to around 20cm above the ground. Leave any green basal foliage intact. For woody perennials: Trim back by a third to half of the plant to prevent legginess. Don’t prune too heavily — some won’t recover! Bonus tip: Use healthy cuttings for propagation (see below). Time to lift & divide perennialsPerennials are the workhorses of the garden, but after a few years they can become crowded, woody or stop flowering. That’s when it’s time to lift and divide them. Signs it’s time to divide your plants: The plant is dying off in the centre Stems flop over Flowering is poor When to divide perennials: Spring-flowering perennials → Divide in autumn Late summer/autumn-flowering perennials → Divide in spring How to divide perennials: Water well the day before. Use a spade to dig a wide circle around the plant. Gently lift it out. Tease apart the bare roots by hand or cut with snips/spade if needed. Replant with fresh compost and a dose of seaweed tonic to ease transplant shock. Propagating perennial plants by division or cuttings?Autumn is a great time to grow your perennial plant collection or share plants with friends. Free garden plants, yes please! After pruning or dividing, propagate cuttings or pot up divisions to establish over winter forspring planting. Some perennials can’t be divided and must be propagated from cuttings. Examples of theseare: Hydrangea, Salvia, Penstemon, Verbena bonariensis, Scented Geranium, Roses, Lavender, Rosemary, Mint and Chrysanthemum. How to take perennial cuttings: Choose non-flowering lateral shoots with healthy growth. Cut with clean snips and place in a ziplock bag to prevent moisture loss. Strip lower leaves, leaving two sets of leaves at the top. Use a free-draining mix (eg. potting soil + sand/pumice). Insert cuttings around the edge of the pot, where it’s moist and cool. Water, cover with a ziplock bag or humidity dome. Use a heat mat to speed up rooting (2–4 weeks). Pot each cutting individually and water with seaweed tonic. Let them mature before transplanting outdoors. Rearranging the garden borderAutumn is the ideal time to rearrange your perennial flowers and garden border. With summer still fresh in your mind, you’ll know where gaps appeared or where combinations fell flat. Because plant and root growth has slowed, now’s the perfect time to lift and relocate underperforming plants or adjust for better balance. Whether it’s too much full sun, too little moisture or just an uninspiring design — move them now and give them a chance to settle in before winter. Final autumn perennial plant care tipsWrap up your garden prep with a few simple and rewarding tasks: Weed thoroughly to start the next season clean. Weeds compete for nutrients and will rebound fast next spring. Feed your soil: For best results, Apply a liquid seaweed mix or a slow-release fertiliser like OceanFert and add organic matter: compost, aged manure, humates Mulch generously to protect roots, suppress weeds and improve moisture retention. Good options organic mulch options include: Wood chips, pea straw, compost, wool mulch Your autumn perennial to-do list: Plant suitable perennials (see above) Prune selectively, with local wildlife and frost in mind Divide overcrowded clumps Propagate new individual plants Rearrange borders if needed Feed, mulch and tidy up With a bit of thoughtful prep now, your garden will wake up in spring healthier, more vibrant and ready to leap into a new growing season. ________________________________________________ This is a Sage Journal Blog, written for the Gardening Series Sponsored by Bugg

Everything you need to know to prolong your dahlia flowers and prep your tubers for next season Flowers are so fleeting. They’re such a good reminder to us to live in the present moment. And everyone’s (well, lots of peoples’!) favourite flower, the dahlia, is the perfect reminder of this in autumn at the end of the growing season. Dahlias are beautiful flowers and long-lasting cut flowers — a must have in your garden beds. These late summer showstoppers take so many months of growing lush, leafy foliage with buds that seemingly take weeks to unfurl when they are young plants in your early summer garden. Finally, by the time we are blessed with abundant blooms, the risk of frost is threatening to end it all for us too soon. But before you start rushing out into the garden to call it a day on their showy blooms, there is still plenty more time left in the season to extend your harvests and prep for next season (as long as the frost-fairy stays away!). In this article, you’ll find out what tasks you should be doing in early, mid and late autumn in the dahlia patch. Frost & flowers Dahlias are frost tender perennials. Meaning they will be damaged by a heavy frost, where their foliage will blacken and die back to the underground tuber. In New Zealand, the warmer climates (areas north of Christchurch) should remain frost-free throughout March and into April. By late April you may have experienced one or two light frosts, depending on your location. For south of Christchurch, your summer season is typically shorter and, unfortunately, you may experience your first frost as early as the beginning of autumn. So, it pays to be vigilant and have your dahlias prepared for this (more on this below). Early autumn: Keeping dahlias blooming Extend your harvest If you’re north of Christchurch, you’re in luck — there’s still time to enjoy bucket loads of dahlias! Keep deadheading spent flower heads, and your plants will continue their flower production. When cutting, go deep into the plant to prevent it from becoming top-heavy. Prevent disease As temperatures cool, pests and diseases become more active. Powdery mildew is a common issue for dahlias, but you can minimise its spread by removing lower leaves to for good air circulation and improve airflow. If powdery mildew appears on upper leaves, treat it quickly with a homemade milk tea spray. Watch for pests Katydids, caterpillars and earwigs love dahlias — and not in a good way! It’s a good idea to clear away dead plant material to avoid attracting these unwanted visitors. Think of it this way: a tidy garden means fewer pests looking for an easy meal. Fertilising for continued blooms If frost isn’t a concern in your area, you can give your dahlias one last feeding to encourage flowering into the winter months. Choose a phosphorus and potassium-rich fertiliser to support strong stems and blooms — avoid nitrogen-heavy fertilisers, as too much nitrogen can weaken tubers. A sprinkle of natural potash at the base of the plants before mulching works wonders for those floppy late-season blooms. Mid autumn: Prepping for the seasonal shift Reduce plant stress With warm days and cool nights, your dahlias plants will appreciate a little extra care. Start a fortnightly seaweed application — either as a soil drench to get beneath the soil surface or foliage spray — to give them a natural resilience boost. Mulch for protection A layer of compost mulch not only insulates the soil on chilly nights but also helps the soil retain moisture during warmer autumn days. If you lift your tubers later, this mulch will mix nicely into the soil when the time comes. Label before it’s too late The danger of frost is just around the corner, so autumn is the best time to label your plants! Whether you use tags or flagging tape, having clear labels will be invaluable when lifting and storing tubers. Save dahlia seeds for a surprise Growing dahlia plants from seed is an exciting experiment, since they never grow back exactly the same as their parent plant. If you want to try breeding your own varieties of dahlias, allow some flowers to go to seed. Ideally, wait until the seed heads turn brown before harvesting, but if rain or frost threatens, pick them early and dry them indoors in a glass of water until they’re crisp.Late autumn: Wrapping up the season Cut back after frost Once the first hard frost hits, your dahlia foliage will turn black. This is your cue to cut it back and compost the remains. If you don’t get hard frosts, mimic the process by trimming plants to about 20cm above the ground. If you’re leaving the tubers in the soil, mulch heavily around the base of the plants to protect the tuberous roots. If lifting, wait about two weeks to let the tubers harden before storage. Lifting & cleaning tubers Carefully dig around each clump, leaving a 10cm margin to avoid damaging the tubers. If your soil is heavy or wet, lift gently and use your hands if needed. Shake off excess soil or rinse lightly to check for disease, though leaving a bit of soil can help prevent drying out. Let them dry in a sunny location for a day or two before brushing off any remaining dirt. Check for crown gall While handling tubers, inspect for crown gall — a bacterial infection that appears as white, cauliflower-like growths on the crown or neck. If you spot it, the best thing is to discard affected tubers immediately — do not compost them. Proper storage for healthy tubers Store tubers in a frost-free, dry area. The best way to store dahlia tubers is in crates or cardboard boxes to allow good air circulation — airtight containers can trap moisture and cause rot. Keep them off concrete to prevent moisture loss, placing them on a shelf or table instead. Monitor throughout the season Check tubers regularly. If they start shrivelling, add damp potting mix. If mould appears, mix in vermiculite to absorb excess moisture. A little attention now ensures strong, healthy plants next spring! — As autumn settles in, tending to your dahlias at the end of the season will set you up for success next season. Whether you're trying to extend their bloom cycle, preparing to store tubers or saving seeds, these simple steps ensure strong, healthy growth for your dahlias plants for next spring. A little effort now means you'll be rewarded with another season of abundant blooms — ready to steal the show all over again. The Sage Journal Autumn Gardening Series is supported by bugg®.

One of the best ways to keep your summer garden looking tidy and to encourage more flowers is the simple act of deadheading. Most perennial and all annual flowering plants will flower again if you remove the finished flowers, so being regular in deadheading means a consistent show of flowers through summer and into autumn. If you have an event happening at your place this summer/autumn and you want flowers (and in particular roses!) to be looking their best at the time, you need to be dead heading them 6 weeks before the date to give them time to reflush and rebloom on time. There is another benefit to deadheading. Removing the spent flowers stops the formation of seed heads which if left to mature will do their best to spread themselves around your garden, into gravel pathways or cracks in paths or driveways. Some gardeners are happy to let nature take its course but if you prefer to choose where the plants will grow, stopping self seeding is very helpful. This also relates to weed control. If you don’t have time to deal with a weed right now but it has a seed head on it? Pinch off that flower head! Then you only have one weed to deal with rather than a potential 2000 seeds being released into your garden to grow! To keep summer flowering shrubs looking good and to keep them looking bushy and dense, the time to give them their annual prune is after they finish their main flowering in summer. If you leave it until later in autumn or winter there is a very strong likelihood that you will remove the flower buds for the next summer. So do it in summer after they finish blooming. You may find some that never seem to stop blooming so in those cases you will just have to pick a time and sacrifice some blooms when you trim it. The exception to this rule is of course fruiting shrubs like feijoas, the time to trim them is after they fruit or you will be removing all the potential fruit. Another thing to consider when planning out your floral show is to consider if you want fewer large size flowers or many smaller flowers. It is the same concept as thinning out the developing fruit to ensure you get bigger fruit rather than lots of small ones. If you want to focus on bigger flowers, removing side shoots, pinching off lateral flower buds and even limiting the number of shoots growing from the crown of a perennial plant will channel energy into the remaining shoots and buds. Pests and diseases can start to appear as plants get stressed in the summer heat. Doing a regular wander in the garden will help you recognise quickly when a pest or disease appears. When you spot the first signs, ensure you act quickly. Physically removing the affected part of the plant will remove the first infestation and help to stop or slow down the spread. Make sure that you throw the affected parts in the rubbish bin (not on the ground or in the compost bin) and wash your hands if it is a fungal disease. You don’t want to accidentally spread the spores to other plants in your garden. Follow up with an appropriate spray in order to knock out any remaining insects, eggs or fungal spores and follow up with another spray as per the bottle instructions (approx 10-14 days). Fungal diseases do not go away on their own and pests can reproduce generations of offspring in a short period of time so do something at the time you first see it and (pardon the pun) nip the problem in the bud! Producing fruit and flowers takes a lot of energy so ensure your plants are well fed, either with an appropriate slow release fertiliser or with regular liquid feeding. If your weather is dry, water deeply but less often. A plant watered deeply once or twice a week will send its roots down deep into the soil where they will be less affected by temperature and moisture fluctuations at the soil surface. When you water, ensure the water is directed at the soil, not over the top of the plant. Water on the leaves increases the chances of fungal disease especially in warm weather. And keep in mind that plants may wilt simply because it is really hot, not because they are thirsty so always check the soil moisture before you water. You may find when you check on them later in the day when it has cooled down they have perked back up without being watered. Spreading a generous layer of mulch over the soil when it is damp will also help hold the soil moisture in while making the garden look tidy. Mulch will over time improve the quality of your soil as well which is always a good thing! Finally, as the summer rolls on, make a point of noting any parts of the garden that are lacking summer colour or interest. Go and visit a garden centre at that time as they will have plants in flower available at that time to help you fill the gaps. Likewise if there are plants that are not performing or flower colours are clashing with neighbouring plants, make a note of them to move them in autumn if you want to move the plant or simply get rid of it now and find something that does have a flower colour that works! Summer is such a colourful time in the garden but it can be a big job to keep it looking good. Think of it like a marathon, it’s slow and steady that wins the race.

Winter is the ideal time to carry out a clean sweep, and get on top of any lingering insects or fungal spores from the previous growing season. They can hide in cracks, in plain sight on the stems or in the fallen leaves around the base of the plant. They go dormant, waiting for warmer weather and the chance to make a comeback next spring. Start with the basics: Collect the fallen leaves from around the base of any plant affected by fungal disease or insect during the growing season. Spores and eggs can remain on leaves so if you get rid of these, part of the battle is already won. Ensure that you throw them in the bin or burn them. You don’t want to put them in the compost bin. Home compost rarely gets hot enough to kill off fungal spores. You don’t need to collect up every fallen leaf on your property, just the affected ones. What sprays do you use for a winter clean up? A copper based fungicide is used to clean up spores and create a protective layer over any cuts or wounds on the tree and a spraying oil insecticide smothers any scale insects present on stems, or insect eggs present on the plant. These were traditionally combined and applied together but the current recommendation is to apply them separately, waiting 1 week between applications. Not all sprays are created equal. Copper hydroxide (sold as ‘FreeFlo copper’) has the smallest copper particle size which gives it increased coverage, rain fastness and longevity. That equals better protection and disease control for your plants compared to other copper sprays on the market. Among the available oil insecticides, Enspray 99 oil stands out for having the smallest particle size which again improves coverage and control of pests. The improved coverage also gives it the added ability to smother powdery mildew spores. The 99 in the name refers to it being 99% pure of impurities which significantly minimises the risk of burning when applied. A lesser used winter spray is lime sulfur. As a winter spray and at winter application rates, it is generally only used on deciduous plants as it will cause defoliation (leaf drop). It is useful to help force deciduous plants that are slow to drop their leaves into dormancy and it cleans up lichen off stems and controls scale, mites and fungal diseases. It is effective but it is messy, and you have to be very careful with its application and minimise spray drift onto surrounding evergreen plants that can be burnt. It is really important to note that this spray can’t be used within two weeks of copper or oil sprays. When do you carry out winter clean up sprays? Ideally at the end of autumn, when the trees have dropped their leaves, copper and oil sprays are good to seal all the tiny entry points into the tree, created by the dropping leaves. They protect against fungal disease and clean up any pests that are still present. Follow up with another application later in winter before the spring growth starts. For roses, spray after pruning has been carried out in approx July (If they refuse to drop their leaves, lime sulfur can be applied at least two weeks before pruning and spraying with copper/oil, forcing them to drop their leaves and go dormant). Do another follow up application of copper/oil before spring growth starts. For fruit trees - especially peaches and nectarines that have had leaf curl - Spray with copper at bud swell and repeat 14 days later. Prevention is such an important step in keeping our plants healthy and thriving. Winter clean up sprays are an important step in this process. Remember - ‘A pinch of prevention is worth a pound of cure!’ Shop Garden SprayersShop Weed & Pest Control Written for bugg® by Kelly Jean Reyland from Garden Advice NZ (www.gardenadvice.co.nz)

Autumn is often referred to as ‘nature’s time for planting’ when temperatures are still warm and there is more moisture in the soil. This makes it an excellent time to do some planting, with plants having the opportunity to get roots established before winter dormancy sets in. If your summer flowers have all finished, consider planting autumn flowering plants like echinacea and chrysanthemums that will perform as the summer flowers finish year after year. Start planting your annuals such as violas, pansies, primula and poppies to get established to carry you through the winter months. It's bulb planting time for spring flowering bulbs like daffodils, crocus, freesia, ranunculus and many more! Check to see if your bulbs need a winter chill to initiate flowering. An easy way to help them along is to store them in the fridge for a few weeks before planting, especially if temperatures are still warm. It is also bulb or tuber feeding time for our summer flowering bulbs/ tubers like dahlias that are beginning to finish their show. As they finish and start to die down, they take up food and store it in their tuber for next year's food source, so it is a good investment to get some bulb fertiliser applied now! Keep dead heading your flowering plants to help keep your flowers coming! You still have potentially a good month or two more of flowers to enjoy – depending on the weather. As perennials die down, cut back the dead foliage to tidy them up. Plants like delphiniums and peonies, you cut to ground level. Plants like salvias and penstemons should have some of their stems and foliage left to protect them from the cold. Put any diseased foliage in the rubbish bin. Give them a good weed to tidy up around them and apply a light mulch to protect them. Any vigorous clump forming perennials can be carefully dug up / lifted and divided to give you more plants and to maintain the health and vigour of the plant. Examples include agapanthus, delphinium, hosta and daylilies. You can wait until they have gone dormant or until there is some more moisture in the soil. Keep them well watered after dividing if they are not dormant. If you are keen on trying seed collecting, now is the time to do it. Don’t cut the flowerheads off when they are finished and let them form a seed head. You need to wait until the seeds have ripened – usually they turn from green to brown, black or red – before cutting the head off and popping them in a paper bag to fully dry out. Check every few days as they can be dispersed quite quickly after they ripen. Once they are fully dry, you’ll find you can shake the seeds out of the seed head, to collect in the paper bag. Remove the remains of the seed head to avoid issues with mould, pests or diseases. Store somewhere in a cool dry place and pop a desiccant packet (silica beads) in with them to keep them dry. If you are a sweet pea fan, get your seeds planted now so they can establish and grow over the colder months. You will have stronger plants that flower earlier if you get them planted now. At the end of autumn, if you have heavy soil or the forecast is for a wet winter, you can lift Dahlia tubers, to protect them from rotting. Wait until they have died right back, or a frost has knocked the leaves back. Carefully lift them and you can divide large tubers if you want more plants at this point. Just ensure you keep part of the crown with each division. Rinse the tubers off to clean them, let them dry and store in a cool, dry position until spring. Have a good clean up, removing any plant material, including fallen leaves, if they are or were infected with pests or diseases. This is the best way to help prevent issues the following year. As deciduous shrubs lose their leaves, give them a spray with a copper fungicide to help seal the wounds left by the leaf drop. Lastly, give your flower beds some love and spread a layer of fresh compost over the soil to add some nutrients after a busy season of flowering. It will help keep weeds down and improve your soil, which is always a good thing! Written for bugg® by Kelly Jean Reyland from Garden Advice NZ (www.gardenadvice.co.nz)

IN THE EDIBLE GARDEN In March you can plant the following in most areas of the country… beetroot, blueberry, bok choi, broad bean, broccoli, brussels sprouts, cabbage, cauliflower, carrot, celery, coriander, feijoa, kale, leeks, lemon, lettuce, lime, mandarin, mesclun, onion, orange, parsley, radish, rocket, silverbeet, spinach, spring onion. This lovely late-summer, early autumn period is a great time for sowing winter veg crops, as the temperatures are cooling but the soil is still warm enough for quick germination. As the season begins to turn and we look towards our winter veg, keep crop rotation in mind. Try not to plant veg from the same family in the same spot each year. Each growing season you should plant each 'family' of vegetables in a different position in the garden; read more on crop rotation here. HARVESTING Regularly harvest the last of your berries, tomatoes, beans, zucchini and cucumbers. Picking fruit and veg each day encourages late fruiting & growth (and also helps to keep pests at bay). Potatoes are ready for harvest when the tops have died back. Your pumpkins may be ready this month too. Kumara is ready to dig up once the leaves start to yellow. Dig up 1 or 2 to start with and check for things like size and firmness. Cut one in half and watch how quickly the cut sides dry - if they dry fast, the kumara is ready for harvest & storage. Dig up onions when the tops have gone brown. If the weather is good, leave them out on top of the garden bed to dry out for a few days - this helps them store better. IN THE FLOWER GARDEN Pull up your summer annuals once they have finished flowering (sunflowers, cosmos, marigold etc.) Plant winter flower seedlings such as snapdragon, alyssum, cosmos, pansy, poppies, viola, primula, polyanthus, cornflower, calendula, cineraria, lobelia, sweet peas, marigolds, etc. Deadhead / pick zinnias, roses, dahlias, echinacea, gladiolus, lilies, scabious, sweet peas. Your favourite spring flowering bulbs are in garden centres now! Getting some early bloomers in now means you’ll be able to enjoy early spring colour: Plant daffodil bulbs any time from late February to the end of May. Pick a cool spot for your hyacinth bulbs and plant throughout March and April. Other bulbs to plant now include crocus, bluebells, tulips, snowdrops and freesias. If you particularly like one type of flower, stagger your planting of that one variety. By planting a number every two weeks you’ll find you can extend your blooms (and picking) by a month to six weeks. Read more on that here. Most spring-flowering bulbs need consistent cool temperatures over winter (below 10°C during the day) in order to produce a flower bud. If you live in a warmer area you’ll likely need to pre-chill your bulbs before getting them in the ground; read more on pre-chilling here. Use a bulb planter (like this one from Sneeboer) for the most efficient planting! TASKS THIS MONTH... ☑ Seed saving: Save seeds from tomatoes, cucumbers, melons, beans, cucumbers, pumpkins and courgettes. Dry & store in labelled envelopes so they’re ready for spring-time sowing. We also have gorgeous Seed Storage Tins to help you keep things organised. ☑ Preparing your garden beds: It’s important to revitalise your soil after a busy growing season. You can do this by digging in some organic matter (compost, manure, seaweed, etc.) or by sowing some cover crops. Cover crops (like this clover blend) add nutrients back into the soil, and the nitrogen improves soil structure. You can read more about the benefits of cover cropping & how to do it here. ☑ Make the most of the warmer temperatures and abundant organic matter at the moment by composting! Fresh compost is the BEST way to improve your soil, and in turn your garden. If you don’t already have a compost bin, check out our range here. ☑ Divide your perennial herbs: thyme, chives, rosemary, sage.

IN THE EDIBLE GARDEN The last of the summer harvest! Tomatoes should be at their peak right now; other veggies such as beans, corn, carrots, cucumbers, melons, pumpkin, potatoes, eggplants & more will also be ready for harvesting. Regularly picking fruit and veg each day will encourage late fruiting & growth. Stone fruits (nectarines, peaches, plums) are ready to enjoy. Continue to plant lettuce and a variety of herbs. And it’s not too late to plant capsicum or eggplant, and plant or sow courgettes and corn in warmer areas! As we move further into February, start sowing your winter veg: spinach, cauliflower, broccoli, cabbage, beetroot, kale, silverbeet, carrots, leeks, radish, rhubarb, parsnip etc. IN THE FLOWER GARDEN Continue to deadhead your flowering annuals; this promotes more flowers for a longer period. For roses, continue to remove any diseased leaves and apply a rose fertiliser towards the end of the month. The end of February means summer is drawing to a close… But it also means we can cast our minds towards bulb planting! Early summer bulbs (tulips, daffodils, anemone, ranunculus etc.) will be arriving into garden stores. If you live in a warmer area it’s a good idea to pop your bulbs in the fridge for 4-8 weeks (depending on the variety) to chill before you plant them out. Some pre-chilling tips to keep in mind… > Keep your bulbs in the crisper drawer inside a paper bag (NOT plastic - the bulbs will sweat, causing rot). > Do not place them near the back of the fridge as it may be too cold. > Keep them well away from fruit, particularly apples and pears. These fruits emit a gas called ethylene as they ripen which can damage your bulbs. You can get your bulbs until late autumn; plant continuously throughout this time for continuous blooms in spring. Use a bulb planter for super efficient planting! For more in-depth bulb planting info, check out this blog: Planting spring-flowering bulbs in NZ OTHER TASKS THIS MONTH... > Keep pinching out those tomato laterals! This helps the plant direct it’s energy towards fruiting > Regularly mist the leaves of your indoor plants using a mister and some lukewarm water. Check the underside of leaves regularly; pests such as mealybugs are prolific at the moment! Spray with Enspray 99 as soon as you see the signs of an infestation. > Make sure you're keeping on top of pests outside, too - check out our full range of Insect Pest Control to find a something that works for your garden. > If you have excess fruit or veg harvests, get preserving! > Remove strawberry plants that are over two years old > Mulch! A good layer of mulch around the base of your plants conserves moisture in soil, and also suppresses weeds > Water in the morning or evening, making sure to water the roots (rather than the leaves). Check out our Iriso range for easy drip irrigation. > Composting is key at the moment - make the most of the abundant organic material and warm temperatures! There's nothing better for improving your soil than fresh compost or worm castings. See our compost bin and worm farm ranges.

IN THE EDIBLE GARDEN Here’s what you can sow or plant this month: Artichoke, beetroot, beans, brussel sprouts, cabbage, capsicum, carrot, cauliflower, chilli, courgette, cucumber, eggplant, leek, lettuce, mizuna, parsnip, peas, radish, rhubarb, rocket, silverbeet, spinach, squash, sweet corn, swede, tomatoes, turnip. For herbs we’ve got basil, chives, dill, fennel, parsley, rosemary, sage, spring onion. Plant new lettuce and herbs regularly so you have a continuous supply throughout the season. These summer vegetables should be ready for harvest: beans, courgette, cucumber, eggplant, garlic, lettuce, certain varieties of potatoes, onion, peas, radish, silverbeet, spring onion, tomatoes. Your sweet corn cobs are ready to be picked when the end tassels start to dry and turn brown. These fruits are also ready for picking this month: apricots, blueberries, cherries, nectarines, peaches, passionfruit, plums, raspberries, strawberries. Get into a good routine of picking every day to encourage continuous fruiting - this is particularly true for cucumbers, courgettes, peas, beans, eggplant. Prune long runners back on strawberry plants to encourage more fruiting. You can then plant these runners out as new strawberry plants! IN THE FLOWER GARDEN Plant alyssum, calendula, cosmos, dahlias, echinacea, gypsophila, impatiens, lupin, marigolds, nemesia, petunias, phacelia, poppy, sunflower, swan plant, verbascum, verbena, zinnia. You can still plant summer flowering annuals & perennials, just make sure you keep them well watered until established. Your main task in the flower garden this month is to pick or ‘dead head’ spent or dying flowers to encourage new blooms. Deadheading is essential for prolonging the flowering period. If you remove the flower as soon as it dies or wilts, you have essentially stopped seeds being created and therefore plant’s life cycle hasn’t been completed. This means the plant will put out more flowers to try and produce seed! This is how you get a flowering plant to keep on flowering throughout the summer and into autumn and avoid having to plant another round of plants. Keep dead heading right through summer and into autumn. You can read more about that here. Here’s a few beautiful blooms that should be ready for picking this month: roses, hydrangeas, fuchsias, dianthus, delphiniums, lilies, gladioli, sweet peas, agapanthus, sunflowers, geraniums, cosmos, sunflowers. Now is the best time for roses, enjoy them inside in a vase or kenzan! TASKS THIS MONTH... When it comes to watering, if it’s particularly dry in your area soak your garden every 3-4 days rather than regular shallow watering. Water early or later in the day, and direct the water to the roots rather than the leaves. We also recommend using a sprinkler with a timer, or installing drip irrigation like Iriso - this can be set up to deliver the right amount of water to your plants, exactly where it's needed. Along with so many other benefits! Pair with a water tank for an even better low maintenance watering set up. You can shop irrigation systems here. Mulching is super important this month! It helps the soil to retain more water and keep roots of your plant cooler in hot weather. Read more about mulching on our latest blog here. Speaking of mulch, get some mulch in around your roses, or check & re-apply as needed. Weeds - like your other plants - are growing quickly at this time of year! Pull them out as they appear (before they go to seed) to stay on top of them. Make sure you remove any weeds before laying down any mulch. You can remove smaller flower-heads on your dahlias plants - this helps to encourage those gorgeous, ginormous blooms! Fertilise your flower beds, pots & containers to help replenish nutrients. Use this organic Opulent Bloom Mix from Seacliff Organics for the most beautiful blooms! It provides a boost of potassium, phosphorous and magnesium to ensure an easy nutrient uptake. It promotes vigorous flowering, and is designed specifically for heavy feeding plants in their flowering phase. Netting or tunnels may be needed to protect ripening tomatoes and other summer fruits from birds and insect pests. Shop garden cloches & tunnels here.

